


An opensource, free content management system that is based on PHP & MYSQL. Both plugins and templates can be installed into WordPress to enhance its functionality. Often associated with blogging, WordPress can be used to create beautiful websites that include but are not exclusive to; Corporate Websites, Online Stores, Magazines, and many more. Today we will learn how to Install WordPress using VestaCP.
Install WordPress using VestaCP
Installing WordPress is very simple and easy, requiring you to download the files from the official WordPress website and to create a database for your website. You will also need PHP and MYSQL as well as a web server installed beforehand to make it all work.
Thankfully with VestaCP these things come included and all that is left to do is create a database then you may proceed to download the code for WordPress and you will be good to go.
You can learn to create a database here;
Create a database then open a terminal window and SSH into your VestaCP server as admin user; Then edit the hosts file and add the WordPress IP address as I have found that without it you will not be able to connect to the WordPress servers to download plugins.
Note: Make sure the database type that you create is MYSQL for it to work properly with WordPress;
sudo nano /etc/hosts
Add the following line below the entry for your domain name in your hosts file;
198.143.164.252 api.wordpress.org
Save and exit out of the file by pressing “Ctrl + O” and then “Enter” to save followed by “Ctrl + X” to exit out of the file. Now move into the directory of your domain using the line below; Be sure to substitute your domain name below.
cd web/mstd.me/public_html/
Now download the WordPress code and extract it into the public_html folder, then delete the remaining unnecessary files that are left;
wget https://wordpress.org/latest.zip
unzip latest.zip
cd wordpress
mv * ..
cd ..
rm index.html latest.zip -r wordpress
Continue installation using browser
Now go to your browser and open your domain; This will open the WordPress setup page;
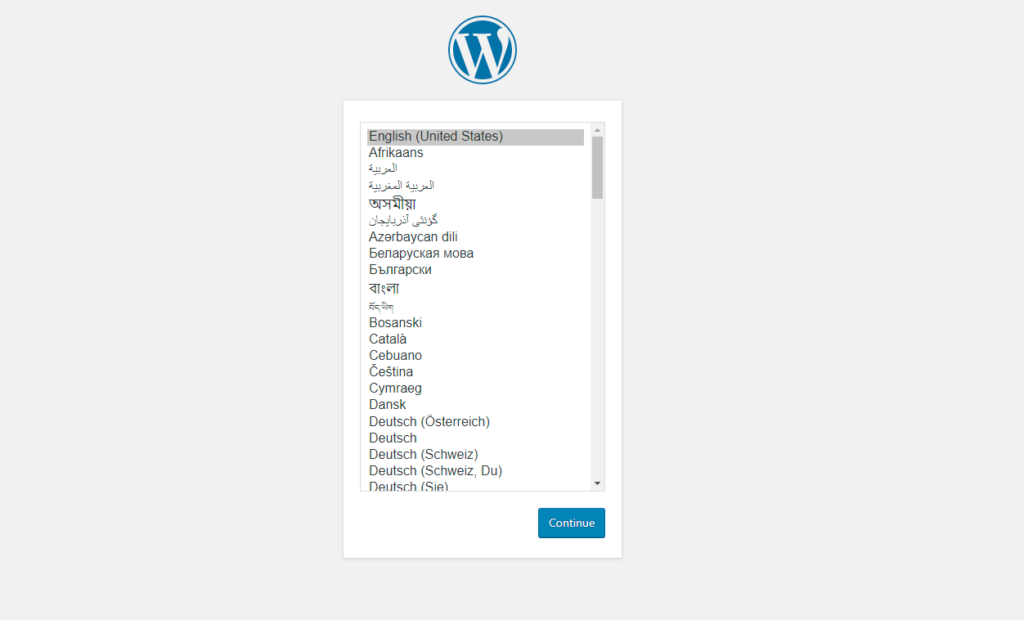
Choose a language and click continue;
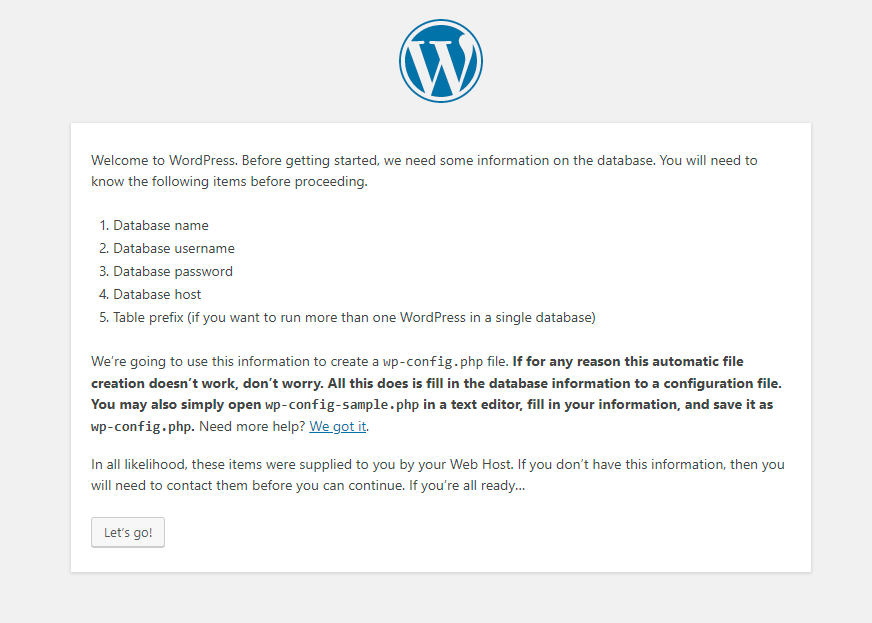
Next you will be asked to key in your database information; Click “Let’s go!” to continue then enter the relevant fields.
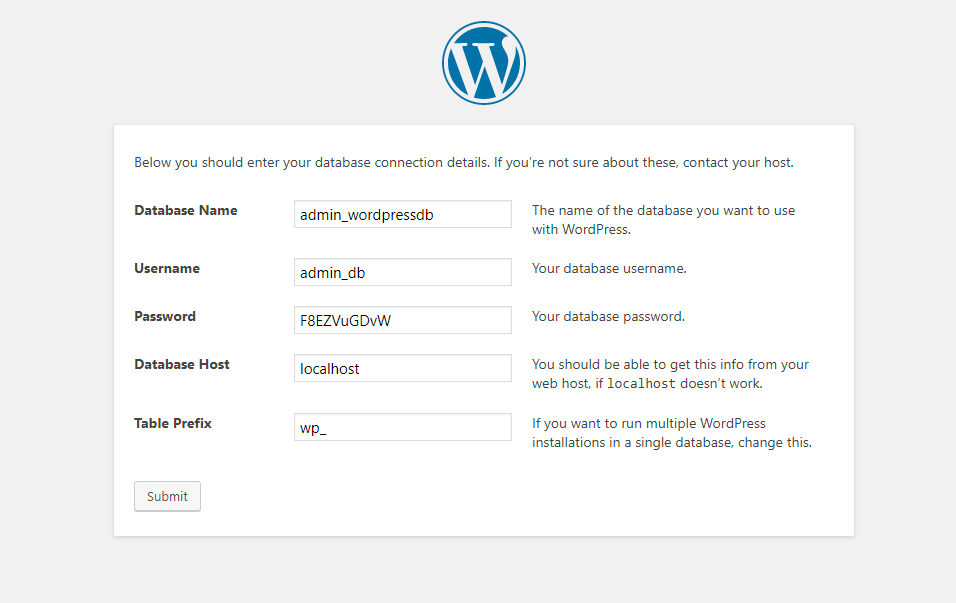
Key in your database information and remember to include the admin prefix that is automatically added when you create a database in VestaCP; then click on Submit to continue.
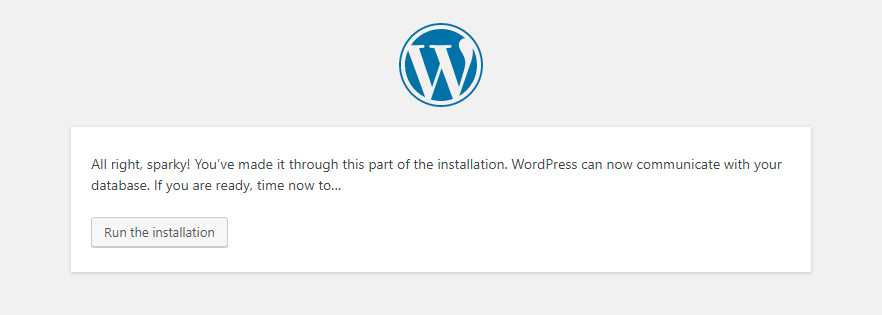
Lastly, Click on “Run the installation” to complete your WordPress install.
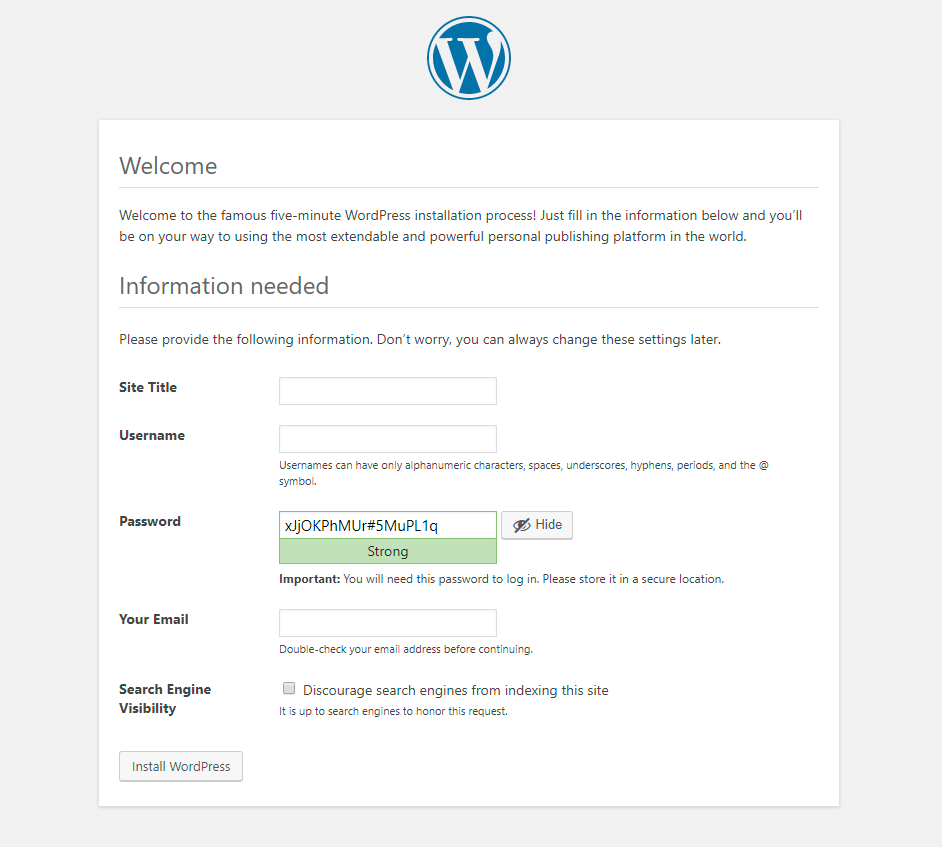
Your WordPress installation has completed; but before you can start building your WordPress site you will need to fill out your Site Title, Username, Password, and Admin Email. Here you can check if you would like to request search engines to hide your website from their search results. Then click Install WordPress and Login into your new installation.
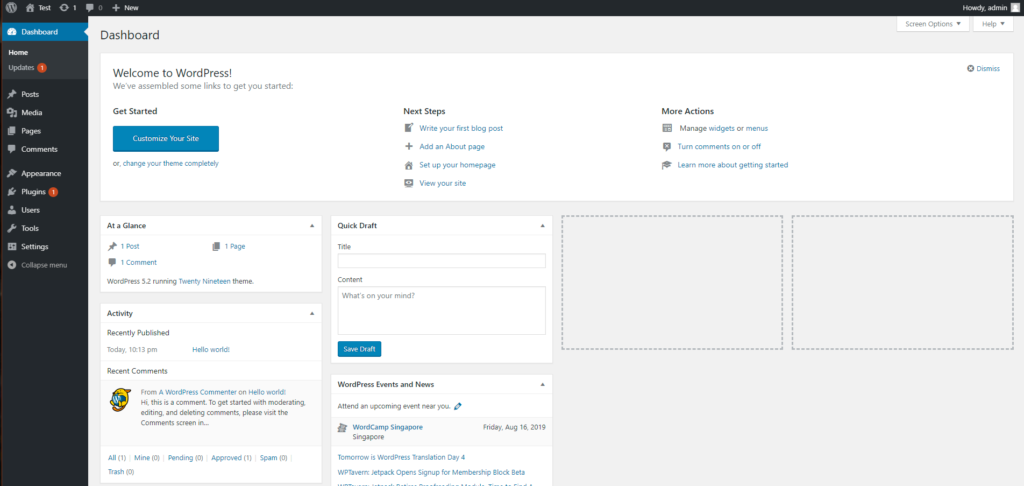
You’re all set now; Welcome to WordPress! You can start building your new beautiful website. Good Luck. If you haven’t installed VestaCP yet you can do so with our tutorial here.


