


An opensource, free web analytics application that is based on PHP & MYSQL. Matomo is an alternative to Google Analytics and has most of the same features. One major benefit that Matomo has over Google Analytics is that all information collected is stored on your server and it is not shared with Google. Let us get started and install Matomo using VestaCP.
Thankfully your VestaCP instance comes with all the prerequisites that are required. All that is left to do is create a database and change the apache2 template that your web domain is using. Then you may proceed to download the code for Matomo and you will be good to go.
Install Matomo using VestaCP:
Now we need to change the apache2 template to include fast CGI or the site will not load properly;
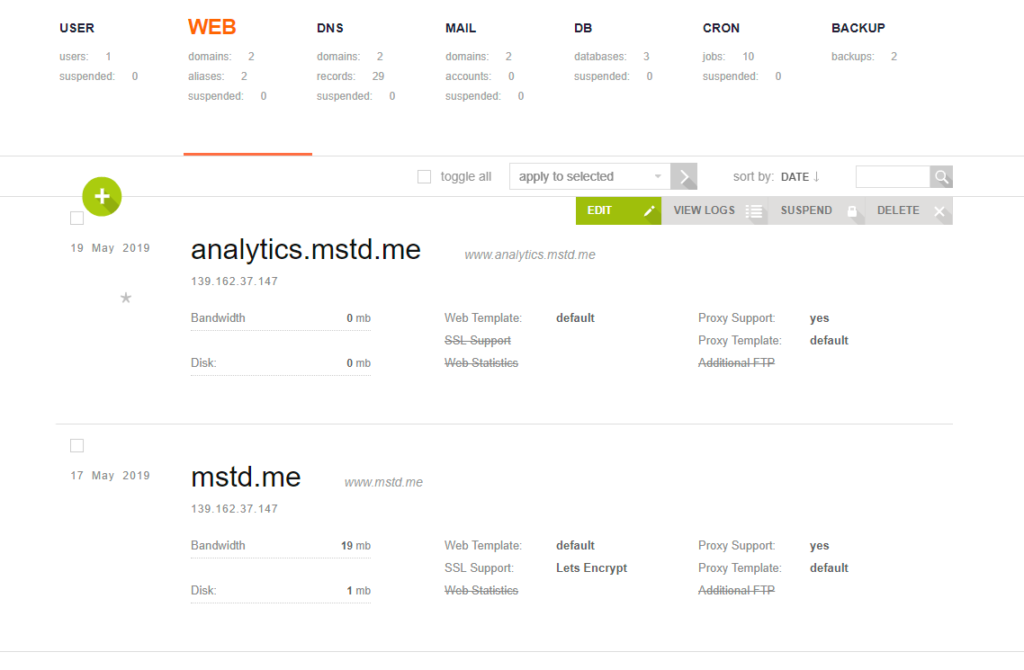
Go to the “WEB” template and hover over the domain that you will be installing Matomo into then click on “edit”;
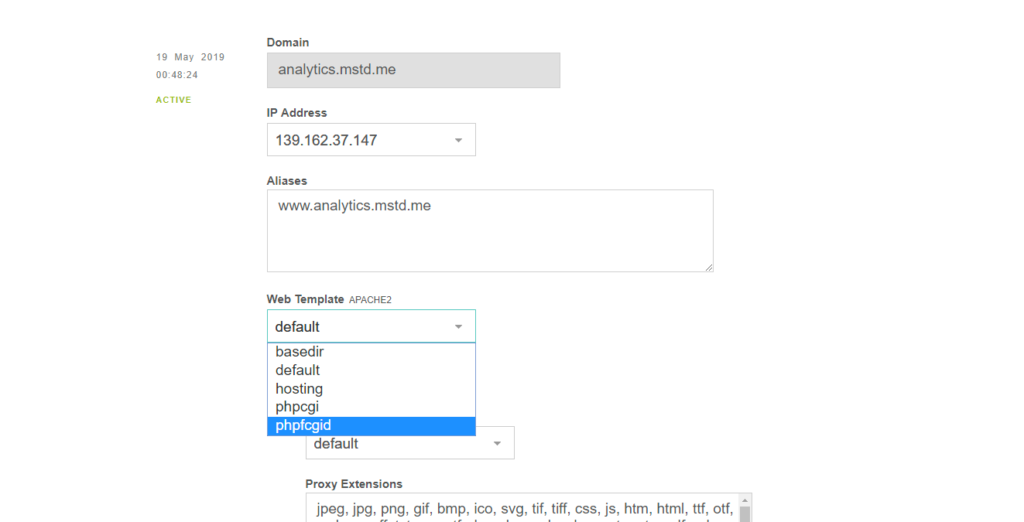
Click on the Web Template option and select “phpfcgid” then click save to continue;
You can learn to create a database here;
Create a database then open a terminal window and SSH into your VestaCP server as admin user; Note: Make sure the database type that you create is MYSQL for it to work properly with WordPress; Move into the public_html directory of the domain you would like to install Matomo into.
cd web/analytics.mstd.me/public_html/
Now download the Matomo code and extract it into the public_html folder. Delete the remaining unnecessary files that are left;
wget https://builds.matomo.org/matomo.zip && sudo unzip matomo.zip
cd matomo && sudo mv * .. && cd ..
sudo rm index.html 'How to install Matomo.html' matomo.zip -r matomo
Change ownership of the files so that Matomo can write to them;
sudo chown -R admin:admin *
Now go to your browser and open your subdomain; This will open the Matomo setup page;
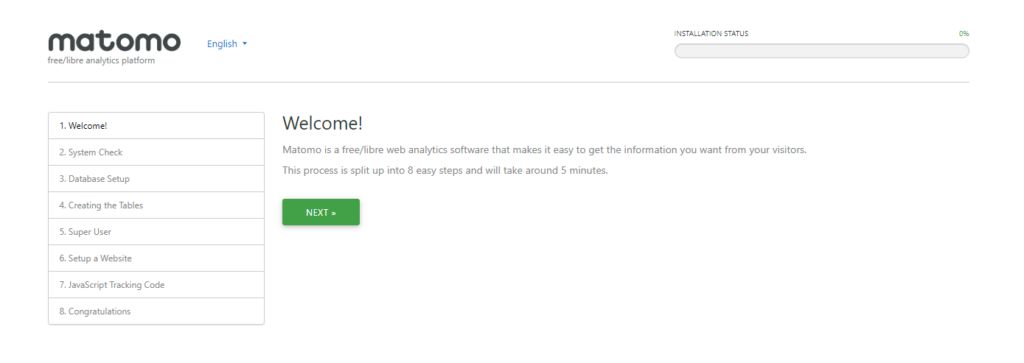
Click next to continue;
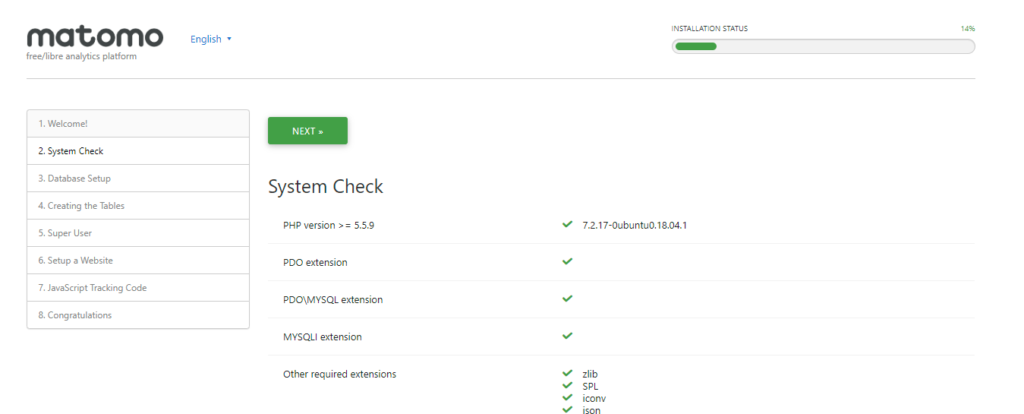
Your Matomo site will run a system check to ensure all requirements are met. Everything should be just fine, click next to continue;
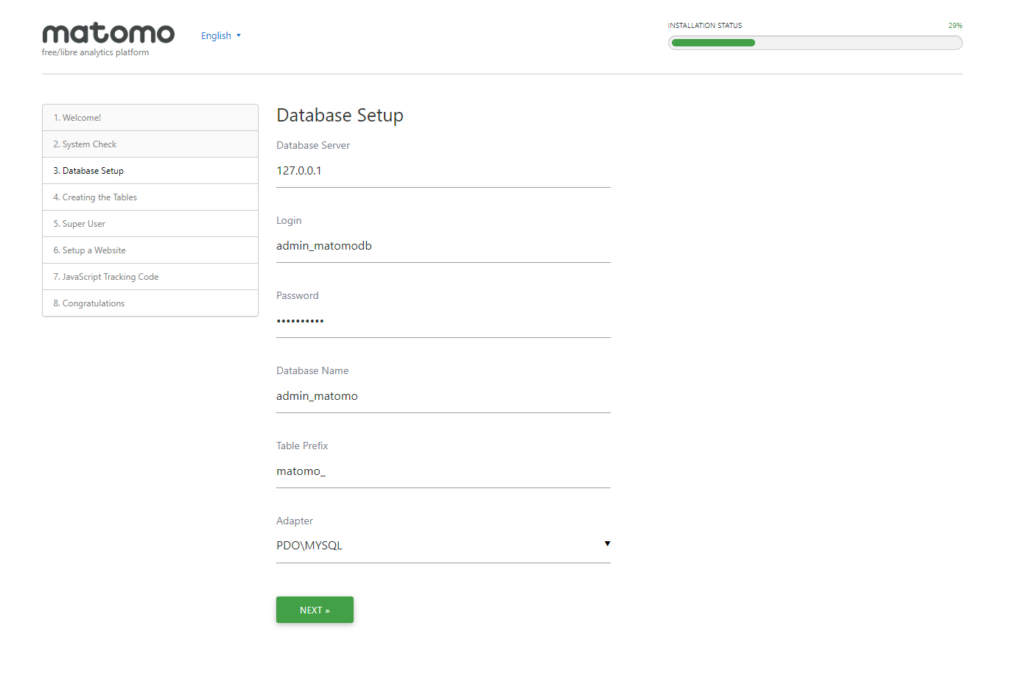
Now please key in your database information. Remember to include the admin prefix that is automatically added when you create a database in VestaCP; then click on Submit to continue.
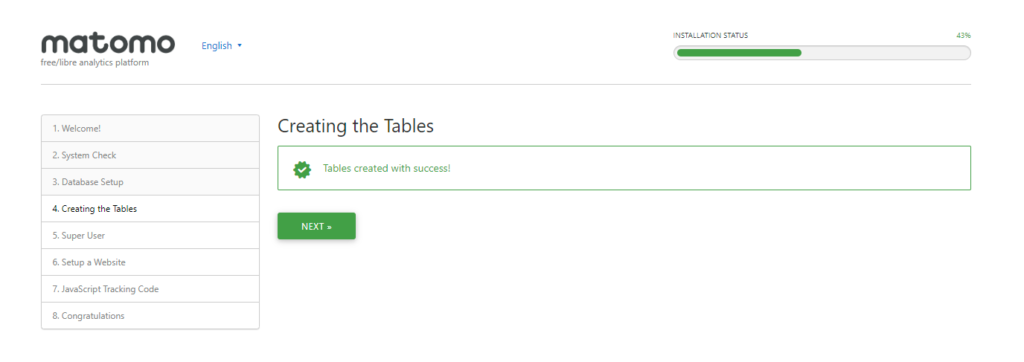
If all the information is correct you will receive a green light from the setup page;

Now create a Super User which is basically an admin user for you to log in to and administer your Matomo installation;
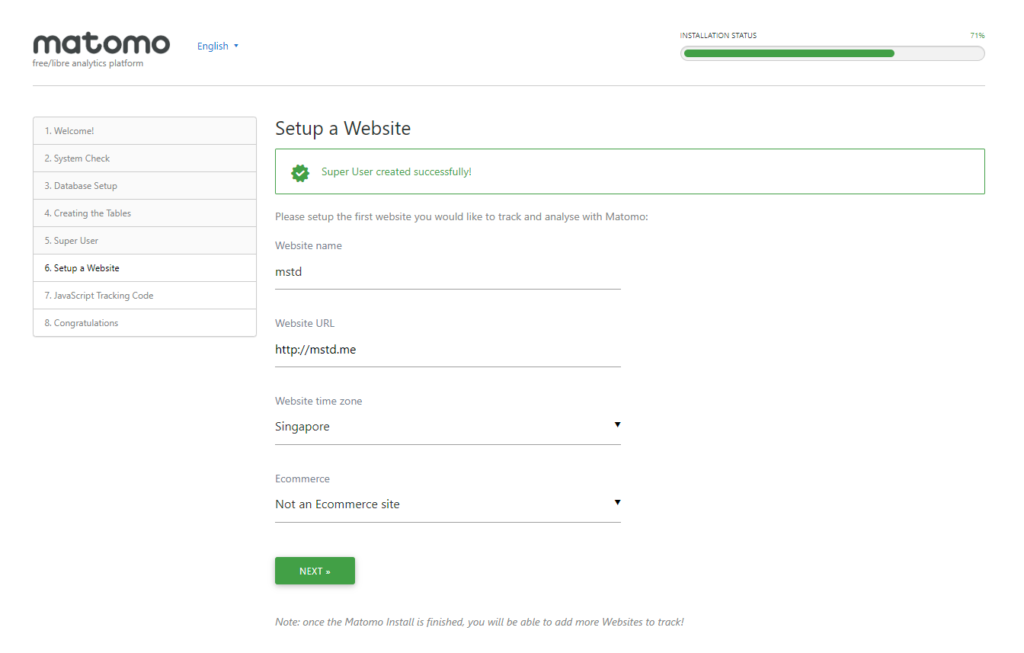
Next, setup your first website that you would like to keep analytics for;
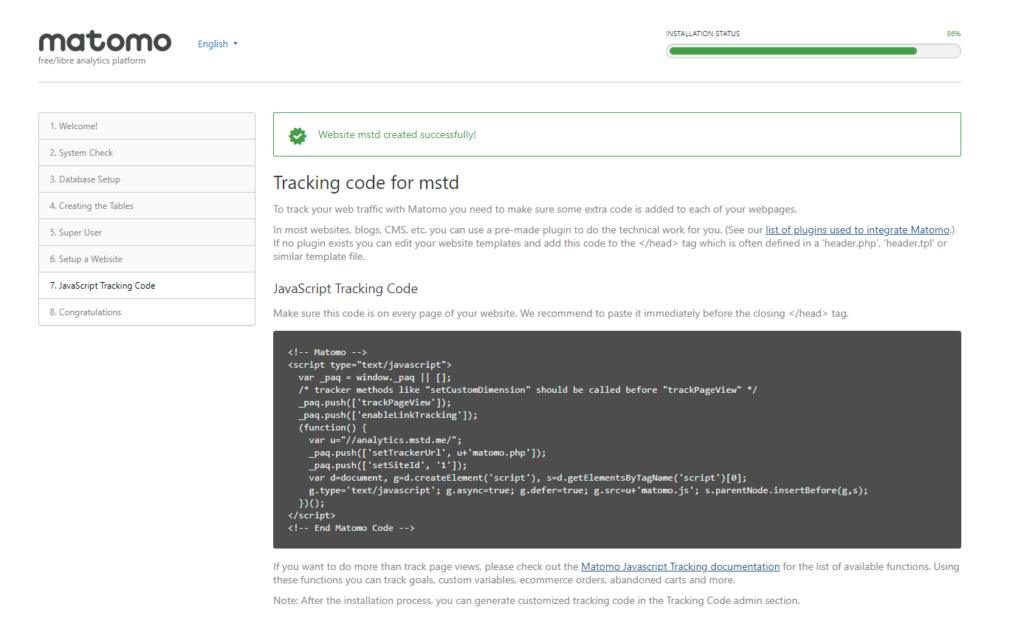
Now the JavaScript tracking code for you website will have been generated. You may add it to your website;
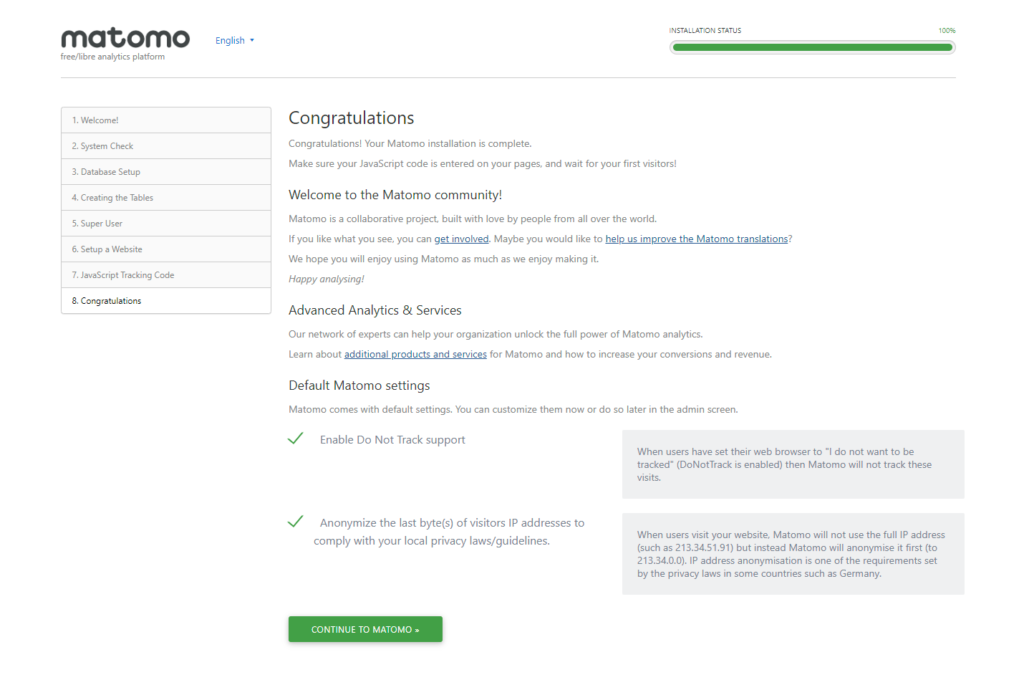
Now your setup has completed and you may continue to Matomo;
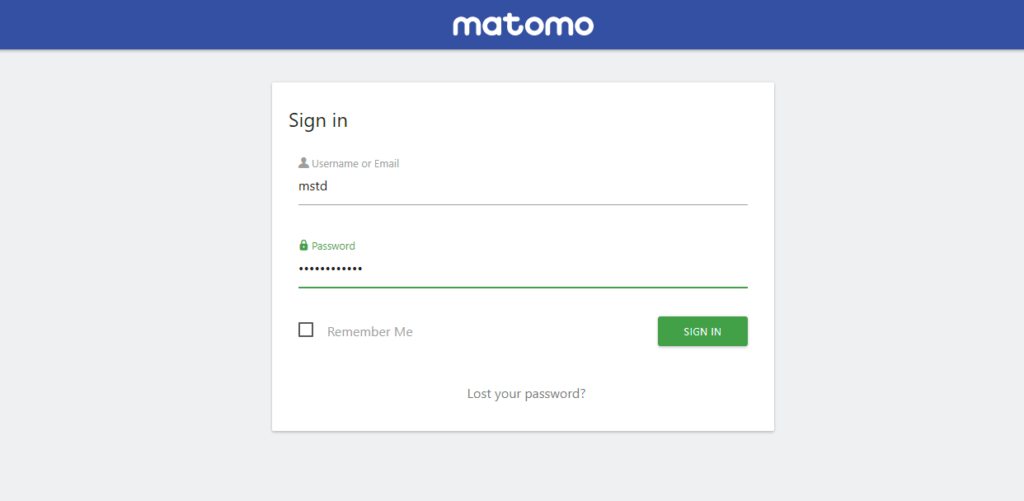
This is the login page for your Matomo installation; use the super user you created during setup and sign in.
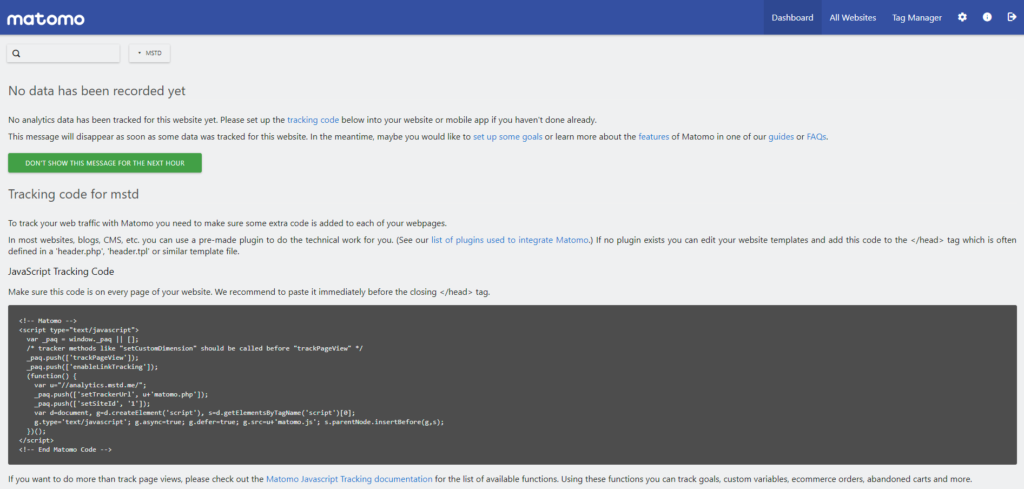
Once you have logged in, you will be met with your dashboard; when your website is visited the relevant data will show up and be logged. You can add as many websites as you like. Feel assured that whatever data that is logged will not be shared with anyone. All of your sensitive visitor data is going to be kept safe in your private server. Good Job.


