


Anaconda is a Python distribution which is open-source that aims to simplify package management and deployment. After you install Anaconda adding and managing virtual environments is easy and quick and does not require terminal know-how. Although if the user wanted to, with a click of a button he could open a terminal into the environment he created.
Anaconda is a simple way to deploy machine learning projects as well as python editors such as Jupyter Notebook. Learning Artificial Intelligence using TensorFlow and Keras is easy and can be done with a few clicks. Let’s get started and install Anaconda;
Download Anaconda Installer;

Open a terminal window in your Ubuntu system; then enter the following code, the Anaconda installer is more than 600MB so this might take a while depending on your internet speed.
sudo wget https://repo.anaconda.com/archive/Anaconda3-2019.03-Linux-x86_64.shsudo chmod +x Anaconda3-2019.03-Linux-x86_64.sh ./Anaconda3-2019.03-Linux-x86_64.sh
Press Enter to continue;
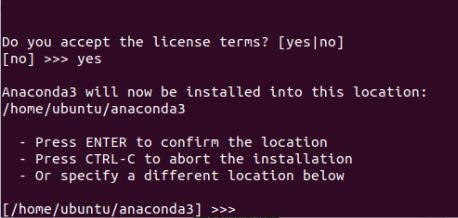
Now you will be given the license agreement to read, scroll down to the end and when you are done and type “yes”. Then press Enter to continue. Next, you will be greeted with the option to specify where would you like Anaconda to be installed into; The default option is fine. Press Enter to continue;
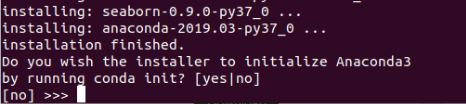
The installer will begin installing Anaconda for you. After it is done you can press Enter to finalize the installation; Restart the terminal window to be able to launch Anaconda. Once the terminal has restarted you will be able to launch the Anaconda Graphical User Interface by typing “anaconda-navigator” into the terminal.
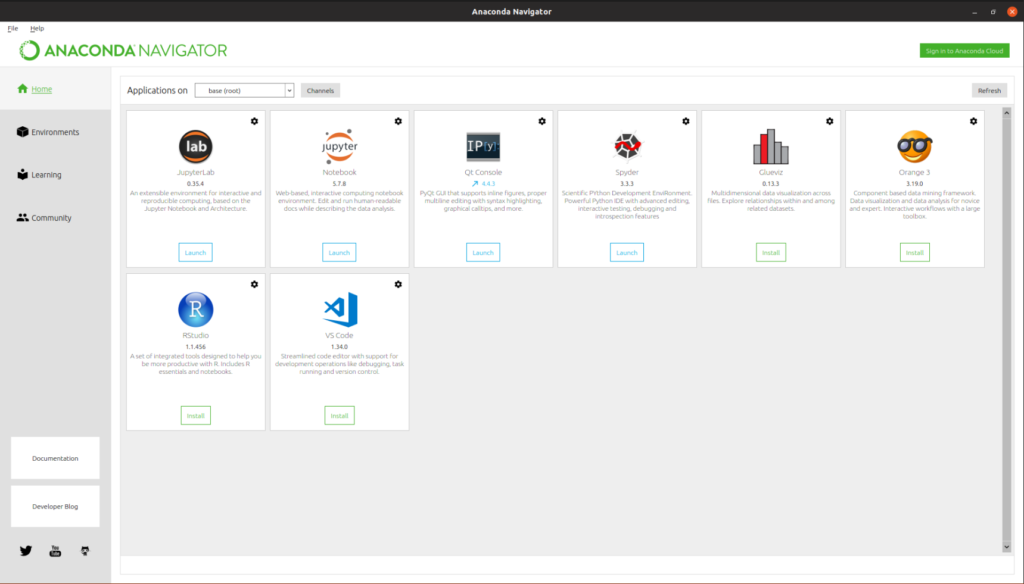
Using the Anaconda Navigator GUI;
There is a much easier way to launch the Anaconda Navigator, and that is by creating a shortcut for it; you can do so by create a .desktop file. Enter the following into the terminal;
sudo nano /usr/share/applications/Anaconda.desktop
Then add the following code into the file; Change your username below,
[Desktop Entry]
Version=1.0
Type=Application
Name=Anaconda
GenericName=Anaconda
Exec=bash -c 'export PATH="/home/username/anaconda3/bin:$PATH" && /home/username/anaconda3/bin/anaconda-navigator'
Icon=/home/username/anaconda3/lib/python3.7/site-packages/anaconda_navigator/static/images/anaconda-icon-256x256.png
Terminal=false
StartupNotify=true
MimeType=text/x-python;
Save and exit out of the file by pressing “Ctrl + O” and then “Enter” to save followed by “Ctrl + X” to exit out of the file. Now log out and log back into Ubuntu and the launcher will appear into your applications menu.
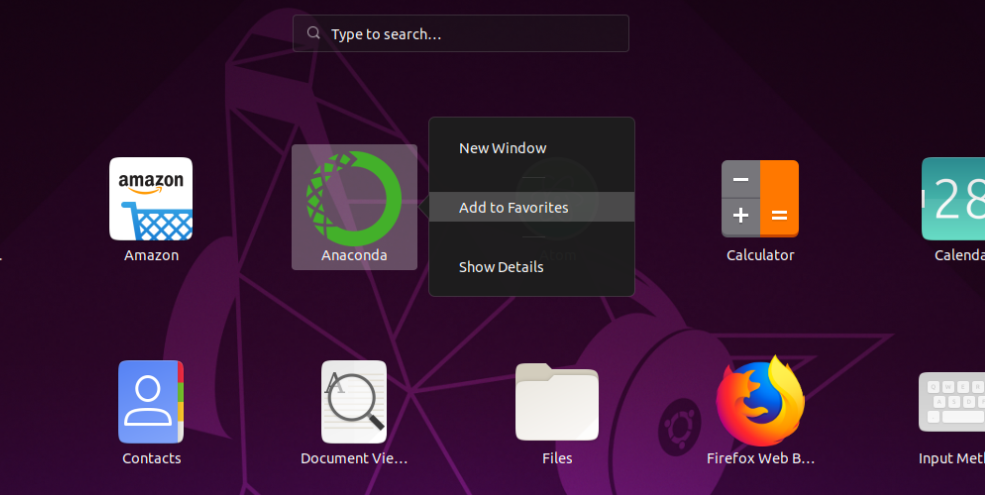
Note: Right click on the launcher shortcut and you will have the option to add it to your dock.
Now you can explore Anaconda and create environments and install whatever packages you wish; Happy hunting and good luck. Check out our tutorial on installing TensorFlow using Anaconda here.


